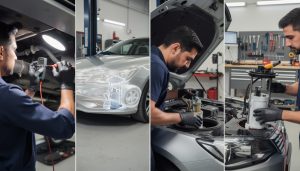
Replacing a front bumper can seem intimidating, but with the right approach, it’s a manageable DIY project. The front bumper acts as your vehicle’s first line of defense, absorbing impacts and protecting essential components. Over time, wear or minor accidents can damage it, requiring timely replacement to maintain your car’s structural integrity and aesthetics. Whether your bumper sports unsightly scratches or suffered a crack in a parking mishap, following a clear, step-by-step replacement guide will save you money and restore your vehicle efficiently.
Key Takeaways:
- Front bumper replacement is a straightforward task with basic tools like spanners, screwdrivers, and wheel ramps.
- Understanding the two-part construction of the bumper—the cover and the real bumper underneath—is essential for proper removal and installation.
- Careful removal of screws, clips, and bolts ensures you avoid damage to other car parts during the process.
- Replacing clips and ensuring the bumper aligns flush with the vehicle frame is crucial for a professional finish.
- DIY car maintenance like bumper replacement can improve safety and extend your vehicle’s lifespan without the expense of professional auto body repairs.
Tools and Preparations for a Smooth Front Bumper Replacement
Before starting the front bumper replacement, ensuring you have the right tool kit and workspace will streamline the repair process. You’ll need a spanner set, socket and ratchet set, wire clippers, a Phillips screwdriver, a flat-head screwdriver, and two wheel ramps. These tools cover the most common fasteners securing the bumper to the car’s frame.
Using wheel ramps is key—they elevate the front of the vehicle, giving you the necessary room to access bolts and tension rods beneath the bumper comfortably. A well-lit, flat, and clean working area also matters to avoid misplacing hardware or damaging car parts during disassembly. Preparing a blanket or towel to rest the bumper cover on helps prevent scratches while it’s off the vehicle.
When selecting replacement parts, using OEM-equivalent or high-quality aftermarket components will ensure durability and fit. Refer to trusted suppliers for car parts especially for specific brands, like if you encounter issues with a Land Rover Freelander or want to replace parts related to auto body components. This can make a big difference in the long run, avoiding frequent repairs or premature wear.
💡 Expert Tip: Keep all removed fasteners organized by type and location. Label containers or use a magnetic tray to ensure nothing is lost before reassembly.
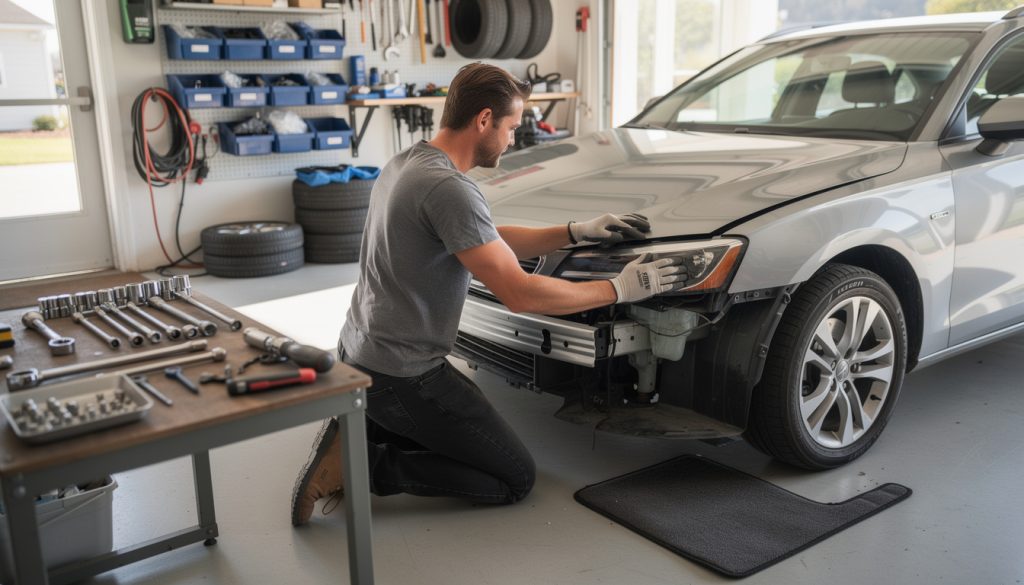
Step-by-Step Front Bumper Cover Removal and Detachment
The first step in removing your vehicle’s front bumper involves detaching the bumper cover—the painted exterior shell visible on your car. Although often mistaken as the bumper itself, this cover conceals the actual bumper bar underneath.
To begin, open the car bonnet and locate screws securing the bumper cover along the top edge above the grill. Using your Phillips screwdriver or a suitable spanner, carefully undo these screws. Once these screws are removed, focus on the plastic clips underneath the bumper cover that hold it firmly in place. Employ a flat-head screwdriver to gently pry these clips loose without cracking them.
After uncapping the plastic clips, you’ll find a few clips anchoring the bumper to the body, which must be cut with wire clippers. Cut these clips carefully to avoid damaging the car’s bodywork. At this point, the bumper cover should pull away easily. Rest it on a soft surface like a blanket to avoid scratches.
At this stage, you may notice common failure points such as brittle plastic clips or minor cracks in the bumper cover. These are typical symptoms indicating it’s time for replacement rather than repair. Each vehicle model might have different clip types, so consult manufacturer repair manuals or online resources. Incorrect handling may lead to damage to underlying sensors or wiring, particularly for models with fog lights or parking sensors integrated into the bumper.
💡 Expert Tip: Take photos during each removal step. They will serve as reference points during reassembly, especially if you are performing vehicle repair on similar models in the future.

Removing the Real Front Bumper: Bolts, Tension Rods, and Final Detachment
With the bumper cover safely removed, the next task involves detaching the actual bumper bar. This reinforced structure provides impactful protection during collisions. Using wheel ramps, elevate the front of your vehicle to create workspace underneath.
Slide a body board or creeper beneath the car and locate bolts securing the bumper along its upper edge and sides. Use your spanner set to unscrew these bolts carefully. These bolts typically hold the bumper tightly against the vehicle’s frame, ensuring safety compliance. On some models, tensioning rods located on either side provide extra support and must be removed using a socket and ratchet set.
Keep these bolts and rods safely stored, as overlooking a fastener can lead to misalignment or loose bumper installation. Once all fasteners are removed, you can gently detach the bumper bar and set it aside. Depending on your car model, you may need to disconnect wires for fog lights or sensors embedded in the bumper. Make a note of any electrical connections to ensure smooth reinstallation.
Watch for damaged fasteners or corroded bolts. Failed bolts reduce the strength of the bumper mounting, posing a risk during new bumper installation. If bolts or clips look worn, replacing them with new units is advised to maintain secure attachment. For advice on specific car issues, such as those reported with Land Rovers, check out detailed troubleshooting guides online.
Common issues encountered during front bumper removal:
- Stripped bolt heads requiring extraction tools.
- Rusted or corroded fasteners complicating unscrewing.
- Integrated wiring harnesses requiring careful disconnection.
- Misaligned mounting brackets making removal tricky.
Installing Your Replacement Front Bumper: Aligning and Fastening with Precision
Installation is a reversal of removal but requires attention to detail for a professional finish and reliable function. Position the replacement bumper onto the vehicle frame, aligning it precisely with existing holes for bolts. Thread bolts through and hand-tighten to hold the bumper in place before securely tightening with a spanner.
After securing bolts, reinstall the tensioning rods on either side. These components keep the bumper pressed flush against the frame, preventing vibrations or gaps. If you disconnected wiring during removal, reconnect all lights and sensors ensuring proper functionality.
Painting the bumper before installation may be necessary to match your car’s color. Many aftermarket parts require this step, so factor in additional time and cost. Painting professional-grade bumpers can cost anywhere between $150 to $400 depending on quality and local labor, but DIY enthusiasts can save by prepping and spraying themselves with proper techniques.
After fastening the main bumper structure, lower the vehicle off the ramps carefully. Check bumper alignment visually and physically by pressing on various points to confirm it firmly attaches. Any movement or rattling suggests fasteners may not be tight enough or parts misaligned.
💡 Expert Tip: When tightening bolts, use a torque wrench if available. Manufacturer torque specs ensure fasteners aren’t under- or over-tightened, critical for safety in bumper installation.
Reattaching the Bumper Cover and Final Checks for Reliable Completion
With the bumper securely installed, recover the bumper cover that was removed earlier. Since the clips holding it in place were cut, replace them with new clips designed for your car model to prevent the cover from flapping or detaching during driving.
Align the bumper cover carefully over the bumper, locking it into place by pushing down on the clip areas. Reinsert the screws above the grill and tighten them securely. Ensure a seamless fit where the cover meets the car’s bodywork, avoiding gaps or misalignment that would diminish the vehicle’s appearance and safety.
Perform a thorough inspection around the bumper area, verifying that all fasteners are tight and that there’s no interference with lights or sensors. Take your car for a slow test drive, listening for unusual noises or vibrations under braking or acceleration.
Following these steps prevents common pitfalls such as loose covers or sensor malfunctions, which can impact your vehicle’s performance and safety features. For related repairs like replacing a damaged wing or rear bumper, consult up-to-date tutorials tailored to your vehicle’s make and model.
| Step | Tools Required | Common Issues | Estimated Time | Estimated Cost |
|---|---|---|---|---|
| Remove Bumper Cover | Phillips screwdriver, flat-head screwdriver, wire cutters | Broken clips, scratched cover | 30-45 minutes | Minimal (clips replacement $10-$20) |
| Remove Bumper Bar | Spanner set, socket and ratchet set | Stripped bolts, corroded fasteners | 45-60 minutes | Minimal if no parts replaced |
| Install New Bumper Bar | Spanner set, torque wrench | Alignment issues | 30-45 minutes | Variable ($100-$400 if painting needed) |
| Reattach Bumper Cover | New clips, screwdrivers | Loose cover, snapping clips | 20-30 minutes | $15-$30 for clips |

Mastering the bumper installation process empowers you to tackle a common car repair with confidence. By investing time and using the proper tools, you save on costly professional fees and gain valuable insight into vehicle construction.
Can I replace my front bumper without special tools?
Yes, most front bumper replacements require common hand tools like spanners, screwdrivers, and wheel ramps, making it accessible for DIY car maintenance.
How much does it typically cost to replace a front bumper?
Costs vary depending on parts and painting, but DIY replacement can limit expenses to $100-$400, avoiding costly auto body shop repairs.
What should I check after installing a new front bumper?
Ensure bolts and clips are secure, check for proper alignment, verify sensor connections, and look for any rattles or vibrations on a test drive.
Is it necessary to replace the bumper cover when installing a new bumper?
Not always, but damaged or scratched bumper covers should be replaced or repaired to maintain aesthetics and protection.
What are common problems during front bumper removal?
Issues include broken clips, stripped bolts, rusted fasteners, and difficulty disconnecting integrated wiring or sensors.