The window wiper linkage plays a crucial role in ensuring your car’s windshield wipers operate smoothly and effectively. Over time, this mechanical connection can wear out or seize, leading to erratic wiper movement or complete failure. Replacing the linkage is surprisingly straightforward and can save you from costly repairs or risky driving conditions caused by poor visibility.
Key Takeaways :
- The window wiper linkage synchronizes the movement of both wiper arms by connecting them to the motor.
- Symptoms of a faulty linkage include uneven wiper movement and complete wiper failure.
- Replacing the linkage typically takes around 30 minutes with basic tools like a socket set and spanner.
- Proper positioning of the wiper arms during reassembly is critical to avoid collisions or ineffective wiping.
- Regular maintenance checks can prevent unexpected linkage failure and extend the lifespan of your auto parts.
Understanding the Role and Symptoms of a Faulty Car Window Wiper Linkage
The car window wiper linkage is essentially the mechanical assembly that connects the wiper motor to both wiper arms. Its main job is converting the rotational motion provided by the motor into the sweeping back-and-forth movement you see on your windshield. This part ensures that both wipers move in perfect synchronisation, clearing your windshield efficiently.
Due to constant use and exposure to the elements, the linkage can wear out, become corroded, or seize up over time. This degradation affects the coordination between the two wiper arms resulting in erratic or incomplete wiping motions.
Common symptoms indicating a faulty wiper linkage include:
- Wipers moving unevenly or at different speeds.
- Wiper arms stopping mid-sweep or failing to move altogether.
- Unusual noises, such as clicking or grinding, coming from the wiper motor area.
- Loose or jerky movement of one or both wiper arms.
- Visible damage or misalignment of the wiper arms.
Ignoring these signs could risk poor visibility during rain or snow, directly impacting driving safety. In some cases, the problem might be mistaken for a failing wiper motor, but often the culprit is the linkage itself. To accurately diagnose this issue, a careful inspection of the linkage and its connection to the motor and arms is necessary.
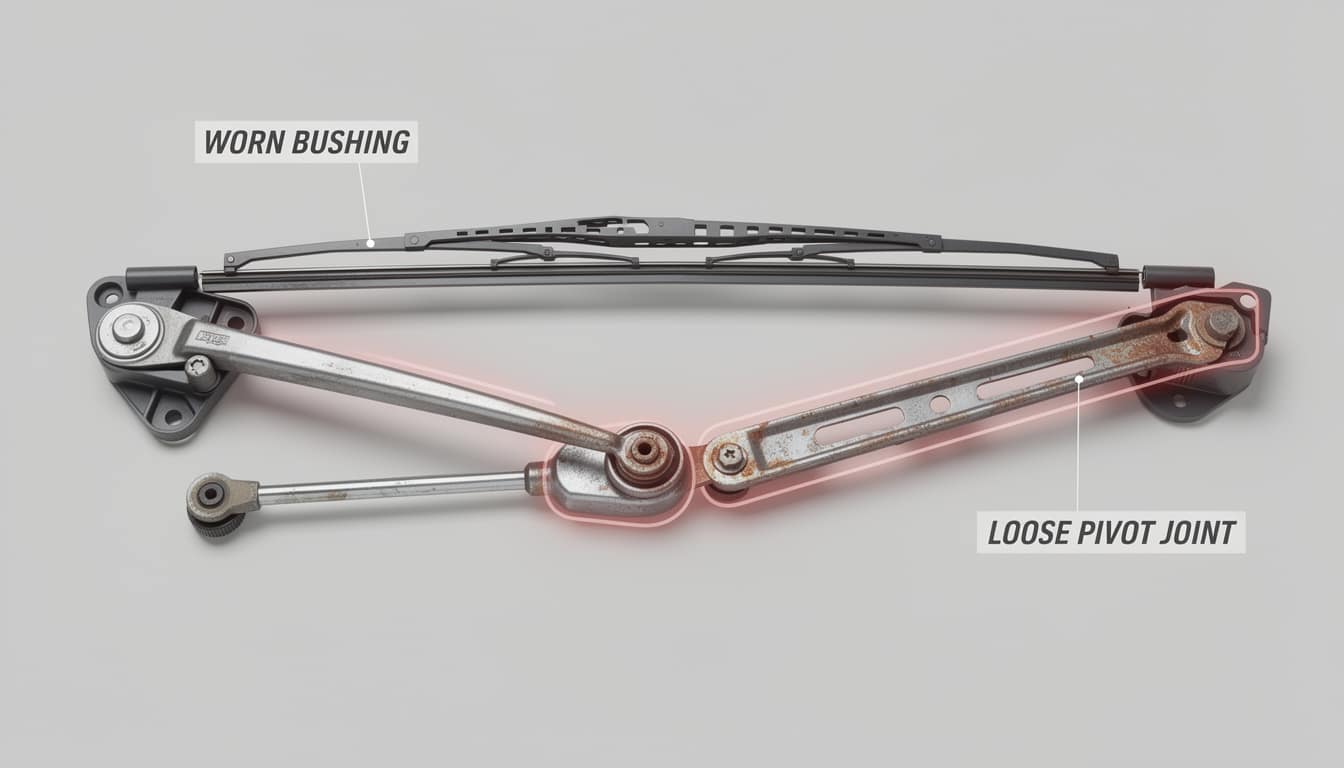
💡 Expert Tip: Always check for worn or brittle bushings in the linkage. These small plastic or rubber components frequently cause sloppy wiper movements and are often overlooked during initial diagnostics.
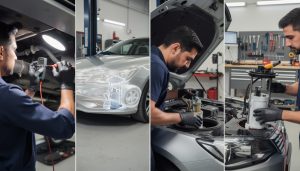
Preparation and Necessary Tools for Replacing the Window Wiper Linkage
Replacing the window wiper linkage is a task you can manage yourself with some mechanical aptitude and attention to detail. The job usually takes under an hour and requires only a few tools, making it an economical alternative to professional repairs.
Tools and equipment needed:
- A socket set or socket spanner for removing nuts and bolts.
- A flathead screwdriver for removing trim panels or caps covering wiper arm nuts.
- Replacement wiper linkage specific to your car model to ensure proper fit.
- Lubricant spray (optional) for easing parts removal and installation.
- Work gloves to protect your hands during the repair.
Before starting, ensure your vehicle is parked on a flat surface and the ignition is off. It’s also a good practice to disconnect the negative terminal of the car battery to prevent any accidental motor operation while working. Refer to your car’s service manual or reputable online tutorials tailored to your make and model for precise instructions.
Preparation involves lifting the car bonnet and locating the wiper arms and linkage assembly. Most linkage systems sit beneath a plastic cover called the scuttle panel or trim, which protects and conceals the mechanical components from dirt and moisture. This trim will need to be carefully removed to expose the linkage. Removing the wiper arms themselves requires loosening two nuts under protective caps – these nuts secure the arms to the linkage pivots.
Taking photos during disassembly can be helpful as a visual reference for reinstallation, particularly to maintain the exact position and alignment of components.

Step-by-Step Process to Remove and Replace Your Car’s Wiper Linkage
Once you have the tools and have located the linkage, follow these steps to replace the part effectively:
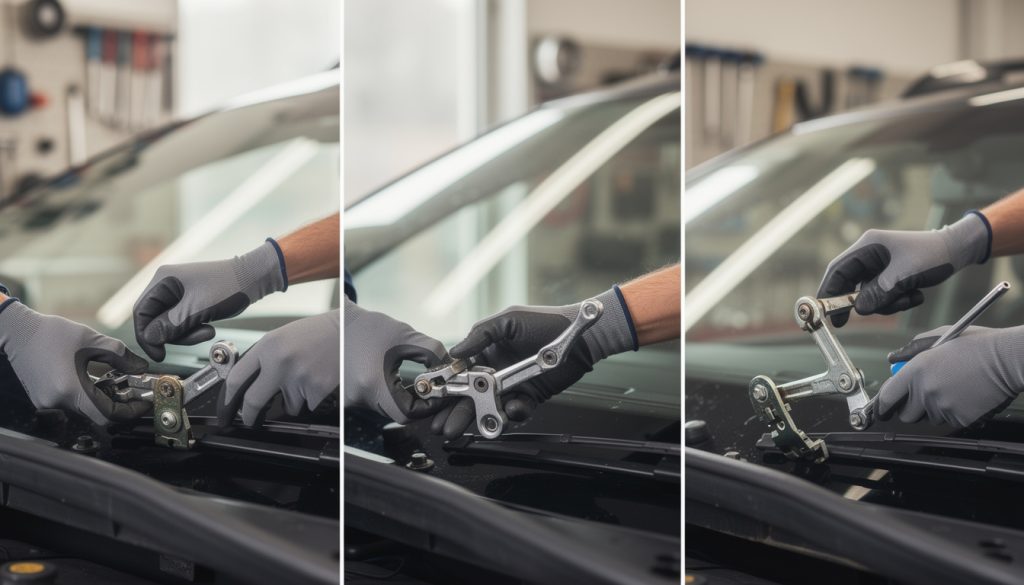
- Remove the wiper arm nuts: Pop off the small caps covering the nuts on the wiper arms using a flathead screwdriver. Use a socket spanner to loosen and remove the nuts, then carefully pull the wiper arms off their pivot points.
- Take off the scuttle panel: Leaning on care here is essential to avoid cracking the trim. Gently lift or unscrew the panel concealing the linkage, exposing the mechanism below.
- Disconnect the linkage bolts: Use the socket set to remove all bolts securing the linkage to the car body. These are usually four or five small bolts holding it firmly in place.
- Remove the old linkage: Once all fasteners are gone, carefully lift the old linkage out of its housing. Compare it side-by-side with your replacement part to confirm compatibility.
- Install the new linkage: Position the new linkage assembly where the old one was mounted. Reinsert and tighten the bolts to secure it. Spray a light lubricant if needed to ensure smooth movement.
- Reattach wiper arms: Put the wiper arms back on their pivots in the exact orientation as before. Tighten the nuts and snap back their caps.
- Reinstall the scuttle panel: Secure the trim firmly to cover and protect the linkage once again.
It is vital during reinstallation to ensure the wiper arms sit in the correct resting position. Misaligned arms can collide mid-sweep or wipe inefficiently. After assembly, reconnect the car battery and test the wipers for complete, smooth movement across the windshield.
Common mistakes that may occur include overtightening nuts which can restrict arm movement, or not positioning the arms properly at rest. Take your time to double-check every step before finalizing the repair.

Costs, Common Issues, and Maintenance Tips for Your Window Wiper Linkage
Replacing the wiper linkage is a low to moderate cost repair depending on your vehicle make. In 2026, most aftermarket linkages range between $25 to $75, making this repair affordable compared to full motor replacements or professional labor fees.
Common issues that lead to linkage replacement:
- Wear and tear from repeated use and exposure to weather conditions.
- Corrosion causing parts to seize or break.
- Physical damage from accidents or improper manual force thrown at frozen or stuck wipers.
Failure to address linkage issues promptly may lead to increased wear on the wiper motor itself, potentially causing more expensive damage. In some cases, worn linkage parts can cause erratic wiper motions that reduce visibility and increase accident risk during rainfall.
Maintenance tips to extend the lifespan of your wiper linkage:
- Regularly inspect the linkage and wiper arms for signs of looseness, corrosion, or damage.
- Apply silicone spray or light lubricant to pivot points annually to prevent seizure.
- Operate the wipers periodically when the windshield is dry to maintain smooth mechanical function.
- Replace wiper blades at least twice a year to reduce mechanical strain on the linkage.
For drivers who want to deepen their knowledge about the relationship between wiper motor issues and linkage problems, consulting detailed guides such as those found on this site is highly recommended.
| Issue | Possible Cause | Repair Cost Estimate | Severity |
|---|---|---|---|
| Complete wiper failure | Broken or seized linkage | $50 – $100 (parts + DIY labor) | Moderate |
| Uneven wiper motion | Worn bushings or bent linkage | $30 – $75 | Low to moderate |
| Noise from wiper motor area | Damaged linkage joints | $40 – $80 | Moderate |
Essential Checks After Replacing the Window Wiper Linkage
Completing the replacement is only half the job. Verifying the proper function of your new window wiper linkage is crucial for driving safety and confidence.
Here’s what to check right after replacement:
- Full range of motion: Turn the ignition on and cycle through all wiper speeds to ensure smooth, consistent wiping.
- Clearance monitoring: Confirm that wiper blades maintain proper contact with the windshield, wiping dirt and moisture effectively without skipping sections.
- Non-interference: Make sure the wiper arms do not collide during operation as this indicates incorrect positioning or linkage alignment.
- Noise level: Listen for abnormal squeaks or grinding that can suggest loose bolts or damaged parts.
If any irregularities appear, recheck the installation steps to correct issues immediately. Routine reevaluation of these points helps maintain your car’s windshield wiper system fully functional.
💡 Expert Tip: After reinstalling your linkage, operate the wipers with a wet cloth on the windshield. This not only tests the full function but also ensures no sudden jerks or slips occur.
By mastering this DIY maintenance and repair, drivers improve their car upkeep skills and prevent the inconvenience of unexpected wiper failure, especially during critical weather conditions.
How long does it take to replace a window wiper linkage?
For most cars, the entire replacement process usually takes about 30 to 60 minutes, depending on your experience and tool availability.
Can I replace the window wiper linkage myself?
Yes, with basic mechanical knowledge and the right tools, replacing the window wiper linkage is a feasible DIY task that saves on workshop costs.
What symptoms indicate a failing wiper linkage in my car?
Signs include uneven or incomplete wiper movement, unusual noises near the wiper motor, or one arm failing to move.
Do I need to remove the entire wiper motor to replace the linkage?
No, generally, the linkage can be replaced separately without removing the wiper motor itself, simplifying the repair.
Is it necessary to realign the wiper arms after replacing the linkage?
Absolutely. Proper alignment ensures the wipers do not collide or miss parts of the windshield during wiping.