Car engines generate significant heat not only from combustion but also from moving components like wheel bearings. Without an efficient cooling system, including a properly functioning car radiator, overheating can quickly lead to severe engine damage or even fire. Recognizing early signs of radiator issues and acting promptly can save you from costly repairs. This article dives deep into the top seven car radiator problems and guides you through the process of radiator replacement with expert insights and practical steps.
Key Takeaways :
- Overheating and coolant leaks are the most common radiator-related symptoms affecting engine temperature.
- Corrosion and clogging reduce cooling efficiency and can lead to irreversible radiator damage.
- Regular car maintenance including coolant flushes can extend radiator lifespan beyond 8-10 years.
- Radiator replacement requires careful draining, hose inspection, and leak testing to ensure system integrity.
- DIY radiator replacement is achievable with proper tools and adherence to a step-by-step guide.
How the Car Radiator Functions to Maintain Optimal Engine Temperature
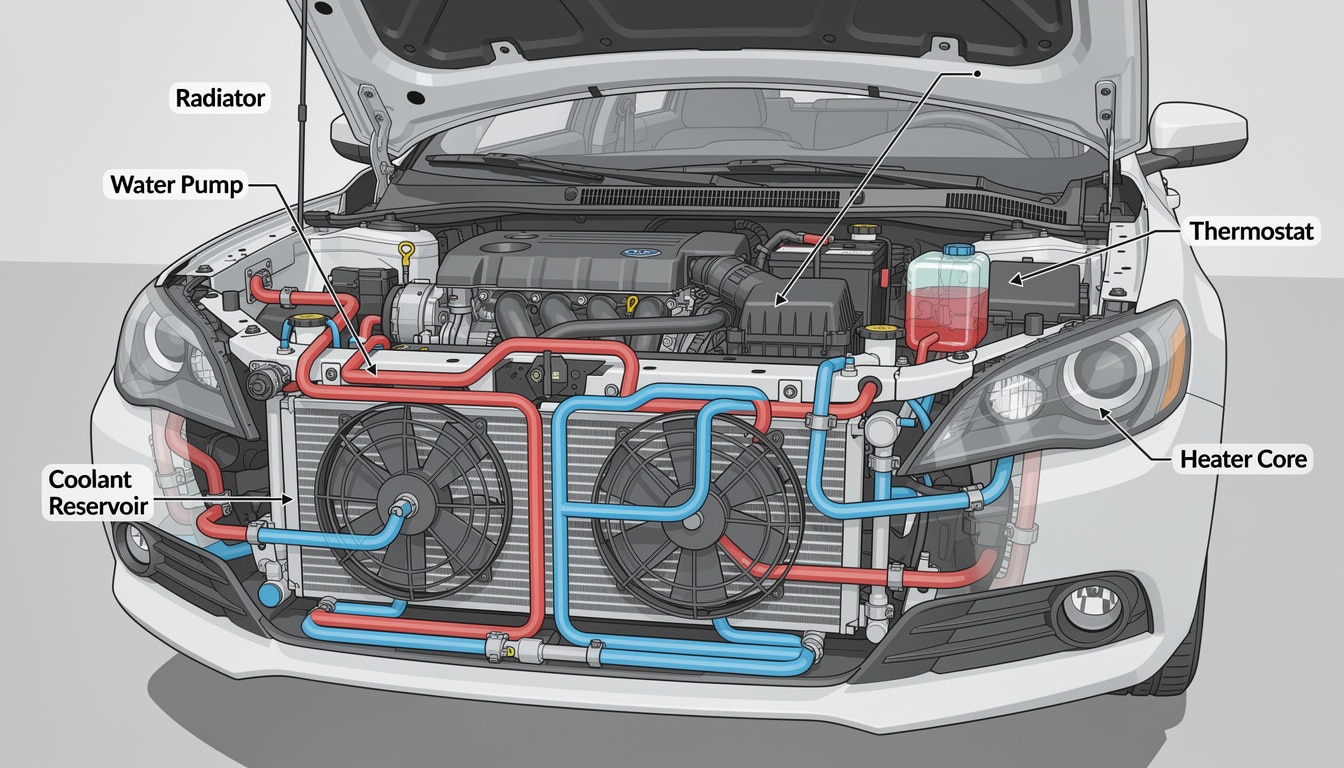
The car radiator is a specialized heat exchanger at the heart of the vehicle’s cooling system, designed to manage the engine’s thermal load efficiently. Circulating coolant absorbs heat from engine components, especially around the combustion chambers where temperatures surge, but also from fast-moving parts such as wheel bearings.
Constructed primarily from aluminum or another high thermal conductivity metal, the radiator channels the hot coolant through a network of thin tubes called fins. These fins are exposed to airflow as the vehicle moves or via an electric fan that forces air through the radiator core. The key is to transfer as much heat as possible from the coolant into the surrounding air to cool the engine effectively.
This continuous circulation keeps the engine within a controlled range—typically between 90°C and 105°C. Exceeding this can trigger temperature warning lights and cause mechanical failure. The design and position of the radiator mean it must remain free from blockages, corrosion, or damage to maintain efficient heat dissipation.
However, the radiator’s reliance on thin tubes and circulation pumps makes it vulnerable to problems like leaks, clogging, and external debris build-up. Neglected, these issues may escalate into severe overheating scenarios. For example, a contaminated coolant can clog narrow passages, forcing the system to overwork.
Proper understanding of the radiator’s operation clarifies why routine checks and maintenance focused on cooling system components are critical. This old workhorse ensures vehicle performance and longevity, and its status should never be ignored.
Top 7 Radiator Issues in Cars: Symptoms, Causes, and Solutions
Radiator problems can manifest in different ways, many of which impact vehicle safety and reliability. Here’s a comprehensive breakdown of the seven most frequent radiator issues, including how to detect and address them quickly.
1. Overheating Engine Due to Radiator Failure
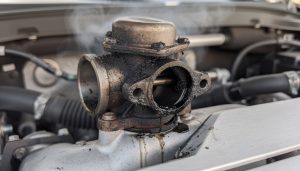
This is the hallmark symptom signaling radiator malfunction. You might notice steam escaping from the engine bay, or the temperature gauge peaking far beyond normal levels. Overheating arises primarily because internal radiator blockages stop coolant from flowing freely.
Common culprits include rust and corrosion, debris clogging the radiator core, or build-up inside hoses. It stresses engine components and can cause costly damage if not tackled immediately.
Solution: Start by flushing and replacing old coolant with the right mixture. If overheating persists, a mechanic’s inspection is necessary to check for internal radiator faults or pump failures.
2. Coolant Leak Spotting: Causes and Fixes
Discovering unexpected coolant puddles beneath your vehicle often indicates a leaking radiator, which if untreated, leads to serious overheating and engine harm. Leaks most frequently stem from cracks, corrosion damage, or compromised radiator seals.
Using improper fluids, like tap water instead of distilled water, accelerates rust and increases leak risks.
How to proceed: A pressure test with dye helps identify leak locations precisely. In many cases, replacing the radiator is the safest fix to prevent recurring leaks.
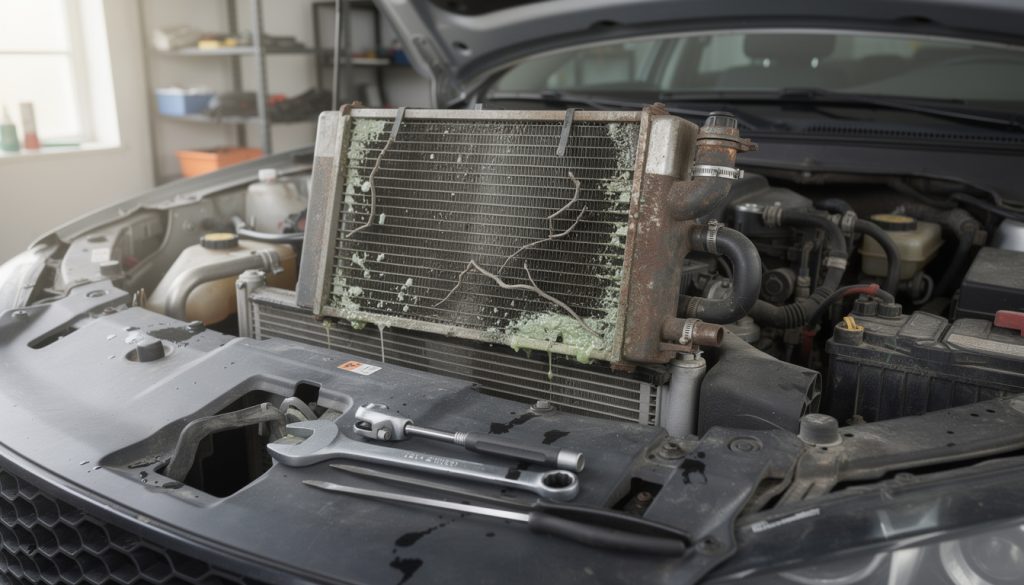
3. Sludge or Discolored Coolant Build-up
If your coolant turns brown or rusty, it’s a sign of contamination inside the cooling system—often from internal rust or a failing transmission cooler integrated with the radiator in automatic transmissions.
Sludge buildup restricts flow and heat exchange, further reducing cooling efficiency and risking engine damage.
Recommended action: A professional radiator flush might clear minor contamination, but persistent discoloration calls for a full system inspection and possible component replacement.
4. External Blocked Radiator Fins
The exterior fins are delicate yet vital, allowing ambient air to dissipate heat effectively. Over time, they attract dirt, leaves, bugs, and pollen, reducing airflow which directly diminishes cooling performance.
Maintenance tip: Regularly cleaning these fins using a garden hose with a diffuser nozzle prevents airflow restriction. Avoid high-pressure water jets which could damage the thin fins.
5. Bent or Damaged Radiator Fins Impacting Cooling
Damage to the radiator fins, caused by road debris or improper cleaning attempts, compromises airflow and heat dissipation. Even minor bends should be addressed, while major damage often necessitates radiator replacement.
Fix: Use duckbill pliers with caution to straighten the fins gently. For extensive damage, procurement of a new radiator is advisable.
6. Passenger Heater Malfunction Linked to Radiator Issues
A failing heater inside the vehicle cabin often correlates with radiator or heater core problems. The heater relies on hot coolant circulation, so a clogged or leaking heater core disrupts heat supply to passenger space.
Faulty heater matrix signs can be early indicators to have the system checked before damage extends.
Next step: Start by testing the thermostat, then have the radiator and heater core inspected professionally for blockages or leaks.
7. Collapsed Radiator Hose Leading to Overheating
At high engine speeds or fast highway driving, a collapsed radiator hose can restrict coolant circulation, causing sudden overheating. This rarely occurs without related faults, typically a malfunctioning radiator cap that does not release vacuum pressure properly.
Solution: Clean or replace the radiator cap to normalize pressure. Persistent issues require mechanic evaluation of the entire cooling system for comprehensive repairs.
These problems highlight the interconnected nature of car radiator issues and the need for vigilant inspection and timely repair. Ignoring early symptoms often escalates vehicle repair costs significantly over time.
Expected Lifespan of Car Radiators and Maintenance Recommendations
Cars today typically have radiators designed for durability, commonly lasting from 8 to 10 years, sometimes longer with diligent care. However, multiple factors affect longevity:
- Type and quality of coolant used.
- Driving conditions, such as exposure to salt in winter increasing corrosion risk.
- Regularity of maintenance like coolant flushing, which prevents sediment buildup.
Observing rust spots, persistent leaks, or frequent overheating are critical signs the radiator may be approaching the end of its useful life. Proper maintenance dramatically extends function:
- Schedule coolant flushes every 2-3 years to maintain system cleanliness.
- Always use manufacturer-recommended coolant and distilled water mixes to avoid rust and deposits.
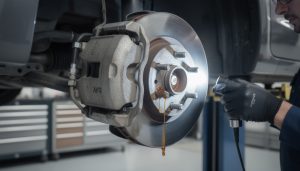
- Inspect hoses and clips regularly, replacing any aged or leaky parts promptly.
Vehicles operating in harsh climates tend to require radiator replacement sooner due to accelerated corrosion. A well-maintained radiator supports efficient engine temperature regulation and fuels long-term vehicle reliability.

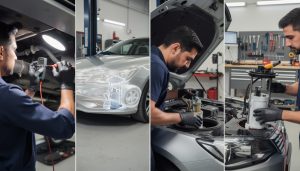
Step-by-Step Guide to Replacing Your Car Radiator
Replacing a damaged radiator is often necessary when repair is impracticable. With the right tools and approach, this task is achievable as a DIY job following these structured steps.
Step 1: Preliminary Inspection and Preparation
Begin by examining all radiator hoses and clips for damage or looseness. Replace any deteriorated components before radiator removal to avoid post-installation issues.
Take notes or photographs of hose connections and clip positions to streamline reassembly. For cars with automatic transmissions, prepare a container to catch transmission fluid released when detaching cooler pipes.
Step 2: Remove Fan Assembly and Disconnect Battery
Refer to your vehicle’s manual to determine whether the fan assembly is bolted or clipped. Carefully remove the fan and any protective splash shields.
Disconnect the battery to protect electrical components and avoid shorts during coolant draining.
Step 3: Drain Coolant Safely
Locate the radiator drain plug at the bottom of the unit. Position a bucket under the drain and open the plug to evacuate coolant fully.
If drainage slows, gently clear blockages with wire or adjust the drain valve slightly. Proper coolant disposal is necessary to meet environmental standards.
Step 4: Detach Radiator and Associated Hoses
Seal hoses temporarily with plastic to prevent debris ingress. Remove all mounting bolts and slide the radiator out with care, checking for hidden fasteners.
This phase requires patience and attention to avoid damaging surrounding engine components.
Step 5: Install New Radiator
Position the replacement radiator carefully and secure it with bolts. Reconnect all hoses firmly and replace clamps if necessary to ensure tight sealing.
Refill the cooling system with the correct coolant-water mixture advised by your vehicle’s manufacturer.
Step 6: Leak Test and Final Inspection
Start the engine and run it until it reaches operating temperature. Observe hoses and connection points for any leaks.
Once cooled, recheck coolant levels and top off as needed. A dry undercarriage and stable temperature gauge confirm a successful installation.
💡 Expert Tip: Use a radiator pressure tester after installation to detect small leaks early and prevent future overheating issues.

| Common Radiator Problem | Causal Factor | Recommended Solution | Estimated Repair Cost (USD) |
|---|---|---|---|
| Overheating | Blockages, rust, pump failure | Coolant flush, mechanic inspection | $100 – $300 |
| Coolant Leak | Cracks, corrosion | Radiator replacement | $400 – $900 |
| Sludge Build-up | Rust contamination | Radiator flush, possible replacement | $150 – $500 |
| Clogged Fins | Dirt, debris | Cleaning fins | $50 – $150 |
| Damaged Fins | Impact damage | Straightening or replacement | $80 – $900 |
| Heater Problems | Clogged heater core | Inspection and repair | $100 – $400 |
| Collapsed Hose | Faulty cap, pressure loss | Cap replacement, system check | $50 – $200 |
For more vehicle-specific radiator and cooling system issues, exploring common radiator concerns found in popular models can be enlightening.
Routine Checks to Maintain Your Radiator and Prevent Unexpected Failures
Preventing radiator issues starts with simple inspections that any driver can perform regularly. Here’s a checklist that covers the essentials:
- Visual Inspection: Look under your car for coolant leaks. Check radiator and hoses for visible wear or cracks.
- Coolant Level and Condition: Ensure levels are within recommended marks and coolant is clean (not brown or rusty).
- Radiator Fins: Clean and straighten any clogged or bent fins.
- Radiator Cap: Inspect for rust or damage. Replace if the seal appears compromised.
- Engine Temperature Gauge: Monitor routinely — rising temperature warns of cooling system issues.
Ignoring these steps often leads to more complex and expensive repairs. Performing maintenance is not only about protecting your vehicle but also about road safety.
Car radiator health directly affects engine efficiency and reliability. If you experience unexplained overheating or coolant leaks, act swiftly and consult a professional if necessary to avoid severe vehicle repair costs. Upkeep and knowledge are your best allies to keep the engine temperature stable across all driving conditions.
How often should I flush my car’s radiator coolant?
It’s advisable to flush the radiator every 2 to 3 years or according to the manufacturer’s recommendation, to prevent build-up and corrosion that impede cooling efficiency.
Can I drive my car with a leaking radiator?
Driving with a leaking radiator is risky as it can cause engine overheating and damage. Immediate repair or replacement is necessary to avoid costly engine failures.
What are the signs that my radiator needs replacing?
Common signs include frequent overheating, visible coolant leaks, discolored coolant, damaged or bent radiator fins, and reduced heating inside the cabin.
What tools are essential for a DIY radiator replacement?
Basic tools include screwdrivers, pliers, a drain pan, socket set, and possibly a radiator pressure tester for leak detection after installation.
How does using improper coolant affect my radiator?
Using tap water or incorrect coolant formulas accelerates rust and contamination, reducing radiator efficiency and lifespan.