Replacing a car fuel tank may seem daunting, but with the right approach and precautions, it becomes a straightforward task. Whether your tank has developed leaks, or you need to upgrade due to fuel system issues, understanding how to safely and effectively perform a fuel tank replacement is essential for vehicle safety and longevity.
Key Takeaways :
- Identify fuel tank issues early through signs like fuel puddles or increased consumption.
- Drain the old tank properly using valves or fuel line disconnection.
- Disconnect fuel lines and air lines carefully to avoid damage during removal.
- Ensure safe removal of suspension or components when access is blocked.
- Inspect the new tank thoroughly after installation to confirm no leaks before refueling.
Understanding Fuel Tank Issues and Why Replacement Is Critical
One of the fundamental components in your vehicle’s car fuel system is the fuel tank. Its primary function is to store fuel securely until it’s supplied to the engine. Over time, fuel tanks can develop damage such as holes, cracks, or corrosion, especially in vehicles exposed to harsh environments or older models. Besides the obvious issue of fuel leakage, the implications can be severe: leaks in diesel tanks pose environmental and fire hazards, while petrol leaks could lead to explosions.
The initial symptoms of fuel tank problems are usually unmistakable. You’ll notice puddles of fuel beneath the vehicle after it’s parked, or your fuel consumption might skyrocket without any change in driving habits. A thorough visual inspection often reveals drips or stains around the tank’s seams. Ignoring such signs jeopardizes vehicle safety and increases emissions, and furthermore, can damage related components like the fuel filter or injector system.
It’s important to address these problems promptly. In many automotive repair cases, a fuel tank replacement is the definitive solution once issues surface. I recommend checking your fuel tank anytime you perform routine car maintenance, especially if your vehicle has high mileage or you detect issues like the engine stalling due to inconsistent fuel flow.
Keep in mind, vehicles like the Land Rover Discovery Sport have been known to occasionally suffer from fuel system issues where tank damage led to early replacement. Recognizing the problem early saves on expensive repairs down the line.
Safe Preparation for Fuel Tank Replacement: Tools and Environment
Before diving into the replacement process, preparation is key. Working with fuel demands adherence to strict safety protocols to avoid fire hazards and toxic exposure. I always ensure work is done in a well-ventilated garage equipped with a Class B fire extinguisher, suitable for flammable liquid fires.
The essential tools for this job include:
- Car jacks and sturdy stands for vehicle elevation
- Spanner and wrench sets for loosening bolts and fuel lines
- Hose clamps to secure fuel lines post-installation
- A fuel can to safely collect drained fuel
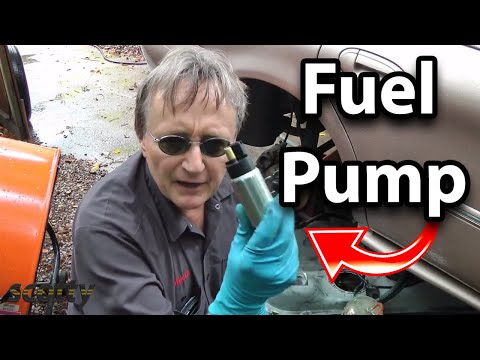
Before handling the old tank, removing excess fuel is crucial to reduce weight and risk. Many modern tanks come with a stop valve that allows neat fuel drainage. When this valve is absent, disconnecting a fuel line becomes necessary to siphon the fuel out safely. This method is effective but requires caution to prevent fuel spills.
💡 Expert Tip: Always use a siphoning pump or similar device instead of high-vacuum methods for fuel removal to minimize static electricity build-up, reducing explosion risk.
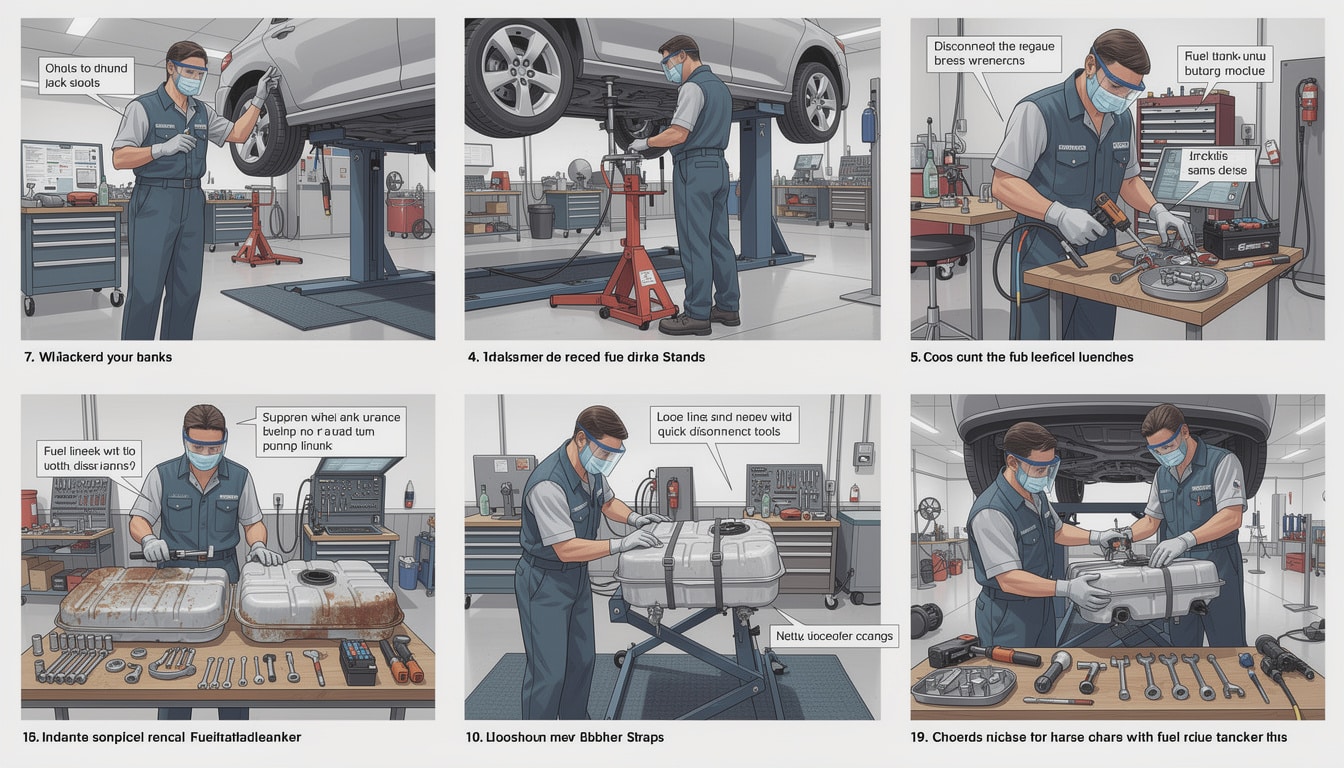
Step-by-Step Guide to Disconnecting Fuel Lines and Removing the Old Tank
Understanding the fuel lines’ layout is vital for a smooth fuel tank replacement. Typically, there are three lines connected to the tank:
- Fuel delivery line: The smaller hose at the bottom channeling fuel to the engine.
- Fuel fill line: The larger hose at the top used when refilling the tank.
- Vent or air line: Allows pressure equalization inside the tank.
Start by carefully disconnecting these lines. Use the wrench set to loosen clamps or fittings, and be prepared for residual fuel to leak during detachment. Label the hoses if necessary to ensure correct repositioning later.
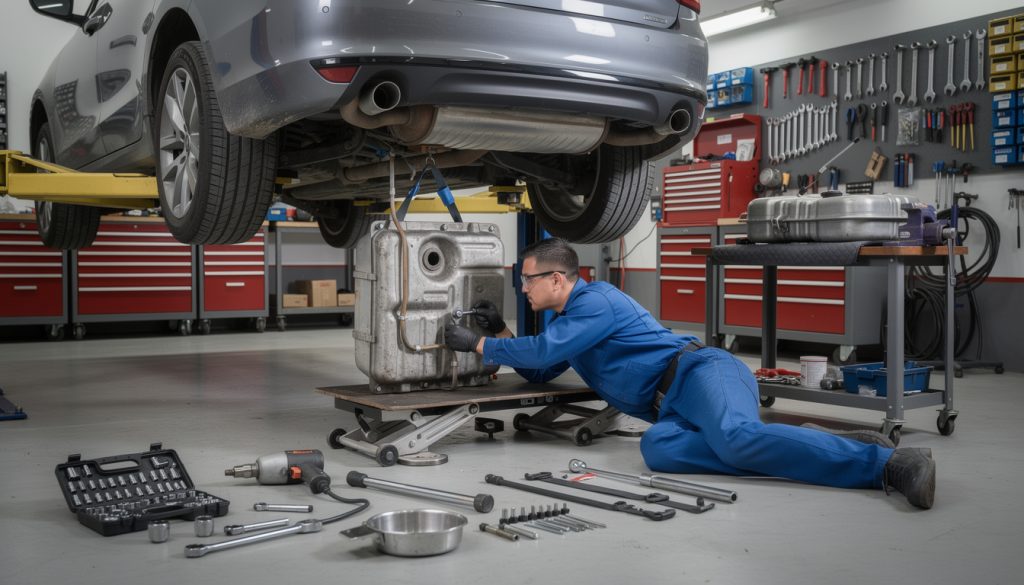
Some vehicles may require dropping the rear suspension if the tank is obstructed by the axle. In this case, disconnect the shock absorbers and brake lines first, then gently lower the suspension beam onto a floor jack. This approach guarantees safe access without damaging suspension or braking systems.
Once access is clear, remove the metal straps securing the tank. These straps are usually fastened with two bolts. After loosening these bolts, lower the tank with care, ensuring no wires or lines are still attached. If necessary, get an assistant to help manage the tank’s weight and prevent damage.
Failure to disconnect lines or bolts properly can cause fuel leaks or damage vital vehicle components, increasing repair costs. For troubleshooting fuel line disconnection, resources on fuel system repair can be found at fuel filter identification and replacement.
Installing the New Fuel Tank and Ensuring Perfect Fitment
Positioning the replacement fuel tank requires precision. Before installation, inspect it thoroughly for integrity — no holes, deformations, or manufacturing defects. Also, check the fuel tank pressure sensor mounting points, as malfunctioning sensors can lead to check engine lights or fuel system irregularities. More about sensor troubleshooting is available at fuel tank pressure sensor diagnostics.
Place the new tank where the old one was located. Fasten it securely using the metal straps and bolts, ensuring no movement or vibrations that can cause damage over time. Reconnect all fuel lines, confirming clamps and fittings are tight and leak-free. Reattach suspension and brake lines if previously removed, and slowly raise the suspension to its original height.
Before filling the car with fuel, inspect all connections. Check for leaks or drips around the hoses and tank surface. It’s best to fill the tank slowly initially and monitor any potential leak points.
| Step | Task | Critical Notes |
|---|---|---|
| 1 | Drain old fuel from the tank | Use stop valve or siphoning pump; avoid spills |
| 2 | Disconnect fuel lines and air line | Label hoses; prepare for fuel leakages |
| 3 | Lower rear suspension if needed | Avoid brake line damage; use floor jack carefully |
| 4 | Remove old tank and inspect mounting area | Check for rust or debris |
| 5 | Install new fuel tank and secure straps | Ensure firm fitment and no vibration |
| 6 | Reconnect fuel lines and check leakages | Tighten clamps; slowly refuel for testing |
💡 Expert Tip: After installation, run the engine briefly while monitoring for warning lights or unusual smells. Early detection of issues avoids costly repairs.
Final Checks for Vehicle Safety and Performance Post-Replacement
Replacing the fuel tank is only part of maintaining your car’s fuel system. After installation, monitoring vehicle performance is critical. Check the fuel gauge, listen for unusual engine sounds, and watch for warning lights. A properly installed tank ensures efficient fuel delivery and prevents hazardous leaks.
To extend your fuel system’s lifespan, regularly inspect components like fuel filters and injectors. Issues with any of these parts can mimic fuel tank problems or worsen them. If you experience starting issues or poor engine performance, consult tips for car not starting to rule out related causes.
Finally, avoid driving immediately after installation on uneven terrain. The newly installed tank needs time to settle, and driving cautiously prevents undue stress on mounting bolts and fuel lines.
Throughout my experience, clean, methodical work in a well-ventilated environment minimizes risks and ensures a successful fuel tank replacement. This procedure, coupled with routine car maintenance, guards against fuel system failures and costly repairs.
Common Pitfalls to Avoid During Fuel Tank Replacement
While replacing a fuel tank is relatively straightforward, several common mistakes can derail the process and compromise vehicle safety:
- Failing to fully drain fuel: Residual fuel can spill during removal, creating fire risks.
- Neglecting to disconnect lines properly: Forceful removal damages hoses or fittings.
- Ignoring suspension components: For vehicles where the axle blocks tank access, incomplete suspension lowering can lead to brake or shock damage.
- Missing leaks on new installation: Rushing to refuel without leak checks might cause fuel loss or fire hazard.
- Using wrong replacement parts: Incompatible tanks or sensors cause malfunctions or regulatory compliance issues.
Carefully following a trusted step-by-step guide and consulting professional diagnostics when uncertain will keep you on the right track. Reviewing similar problems, such as those listed in the BMW Series 4 Problems archive, can help spot related issues affecting your vehicle’s fuel system.

What safety measures should I take before replacing the fuel tank?
Always work in a well-ventilated area, use a Class B fire extinguisher, drain fuel completely, and avoid open flames or sparks near the worksite.
How do I know if my fuel tank needs replacement?
Look for fuel puddles under the vehicle, unusual fuel consumption, or visible damage to the tank surface. A thorough inspection can confirm leaks or cracks.
Can I replace the fuel tank myself?
Yes, if you have the right tools, follow a step-by-step guide, and observe safety protocols. For complex cases involving suspension removal, consider professional help.
How much does a fuel tank replacement typically cost?
Costs vary by vehicle type but expect between $300 to $800 for parts and labor. DIY can reduce costs to around $150 for the tank and tools rental.
What should I check after installing a new fuel tank?
Ensure all fuel lines are secure, no leaks exist, sensors are connected, and the engine runs smoothly without warning lights.