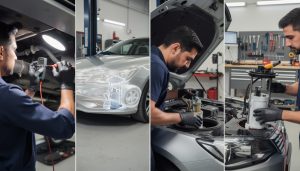
Upgrading your car’s exhaust back box is a popular car modification aimed at improving performance exhaust characteristics and enhancing car sound. Whether aiming for a deeper growl or a more efficient exhaust system, understanding the function and installation process of the back box is critical. This step-by-step guide will explain how to perform a DIY car maintenance upgrade, helping you save on exhaust replacement costs and achieve a noticeable car sound enhancement.
Key Takeaways :
- An exhaust back box reduces noise by slowing down hot gases from combustion.
- Signs of a failing back box include louder exhaust noise, vibrations, and decreased fuel efficiency.
- Replacing the back box requires basic tools and mechanical experience – safety first with proper car jacking.
- Stepwise process includes locating, removing, attaching pipes, and securing the new back box.
- Test drives after installation verify sound and seal integrity to avoid exhaust leaks.
Understanding the Function and Importance of the Exhaust Back Box in Your Car Exhaust System
The exhaust back box plays a pivotal role in the performance exhaust setup by managing the flow and sound of exhaust gases. When your engine combusts fuel, it produces hot, fast-moving gases. The back box’s main function is to slow down and cool these gases to reduce noise, acting essentially like a silencer for your car exhaust.
Without a properly functioning back box, your car’s noise level could rise sharply, resulting in an intrusive loud exhaust sound that negatively affects driving comfort. This is not just about noise pollution; an inefficient back box can cause vibrations noticeable through the clutch pedal or even affect engine performance indirectly by altering exhaust flow dynamics.
In some cases, a worn or damaged exhaust back box might also contribute to a drop in fuel efficiency, as exhaust backpressure changes. This negatively impacts your engine’s breathability and combustion quality over time. I’ve seen drivers confused about why their fuel economy suddenly worsened, and often a faulty or rusted back box is an overlooked culprit.
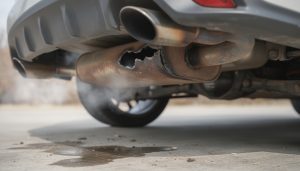
With an aging exhaust system, the back box is one of the first parts to suffer from corrosion or internal damage due to exposure to heat, moisture, and road debris. This wear doesn’t just make the vehicle louder; it can allow hazardous exhaust fumes to leak under the chassis, creating a safety risk.
This importance explains why car exhaust back box upgrade is a vital maintenance task that can improve both your vehicle’s performance and legal compliance with noise regulations.
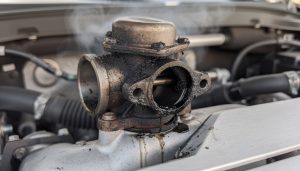
For a deeper understanding of related exhaust component failures and their symptoms, checking out this article on failing exhaust manifold symptoms is very insightful.
Detecting Symptoms and Diagnosing Back Box Issues Before Replacement
Identifying when your exhaust back box needs upgrading is essential to avoid worsening problems and costly repairs. The primary symptom most owners notice is a sudden increase in exhaust noise volume. If your car’s exhaust sounds rattly, deeper, or more aggressive than usual without changing driving patterns, it often points to back box damage or leakage.
Other clues include vibrations underfoot, especially when operating the clutch or at idle. These vibrations come from loosened or broken mounting hangers and deteriorated internal baffles inside the back box. A subtle decrease in fuel economy or engine performance can also accompany these symptoms, as exhaust gases don’t flow properly anymore.
Before opting for a complete exhaust replacement, conduct simple visual inspections. Look for rust spots, holes, or cracked welds on the silencer body. Spray lubricant around fixing nuts and bolts to check if they’re seized or easily removable, which indicates their condition.
Keep in mind that problems like engine misfires or fuel delivery issues can mimic exhaust-related symptoms. For example, engine misfires may result in backfires or rough idling that some might confuse with exhaust noise problems. For clarification, this guide on engine misfires causes and signs can help pinpoint the exact fault.
Addressing back box problems promptly reduces risk to your car’s exhaust system and avoids damage to connected components such as the catalytic converter or exhaust manifold.
Signs to Detect Exhaust Back Box Wear:
- Increased or strange exhaust noise
- Excessive vibrations when clutch is engaged
- Decline in fuel efficiency
- Visible rust, holes or damage on the silencer
- Difficulty removing mounting bolts due to rust
Essential Tools and Safety Measures for a Successful Back Box Upgrade
Preparing your workspace and having the right tools at hand is critical for a smooth and safe exhaust replacement. Upgrading your back box isn’t a beginner’s job but with mechanical experience and proper preparation, a DIY car maintenance enthusiast can get it done efficiently.
First, your vehicle must be on a firm, flat, and dry surface. Use a high-quality car jack to lift the rear end, then secure the vehicle with two jack stands positioned under the chassis. Never rely solely on the jack for support when working under the car—this precaution avoids serious injury or accidents.
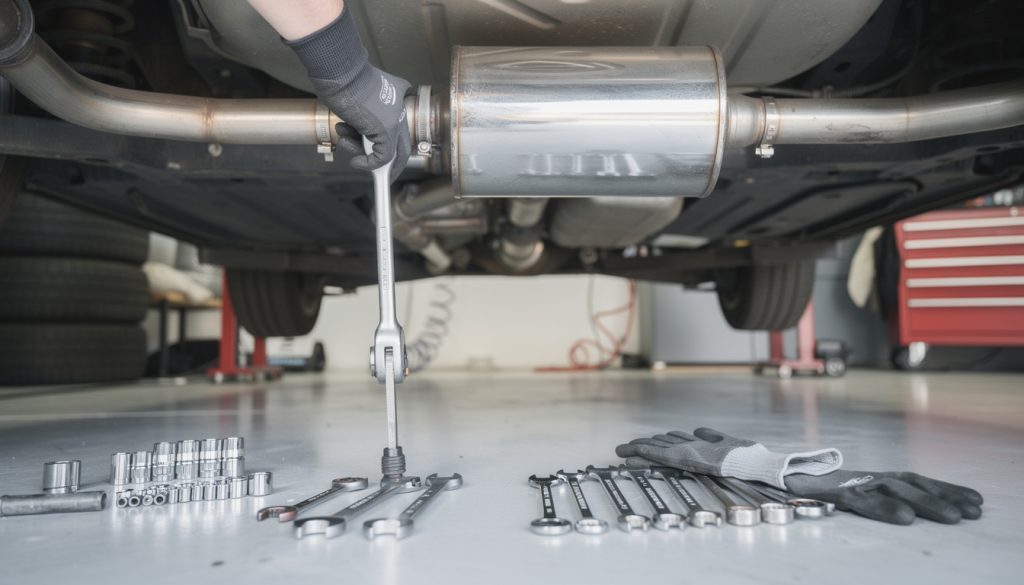
For the job, gather the following tools:
- Spanner or deep socket set (ratchets and extensions recommended)
- Lubricant spray for rusted bolts
- Hacksaw or reciprocating saw to cut exhaust pipes
- Hammer and chisel for stubborn brackets
- Wire brush or sandpaper for smoothing pipe edges
- Sealant and exhaust clamps for proper airtight connections
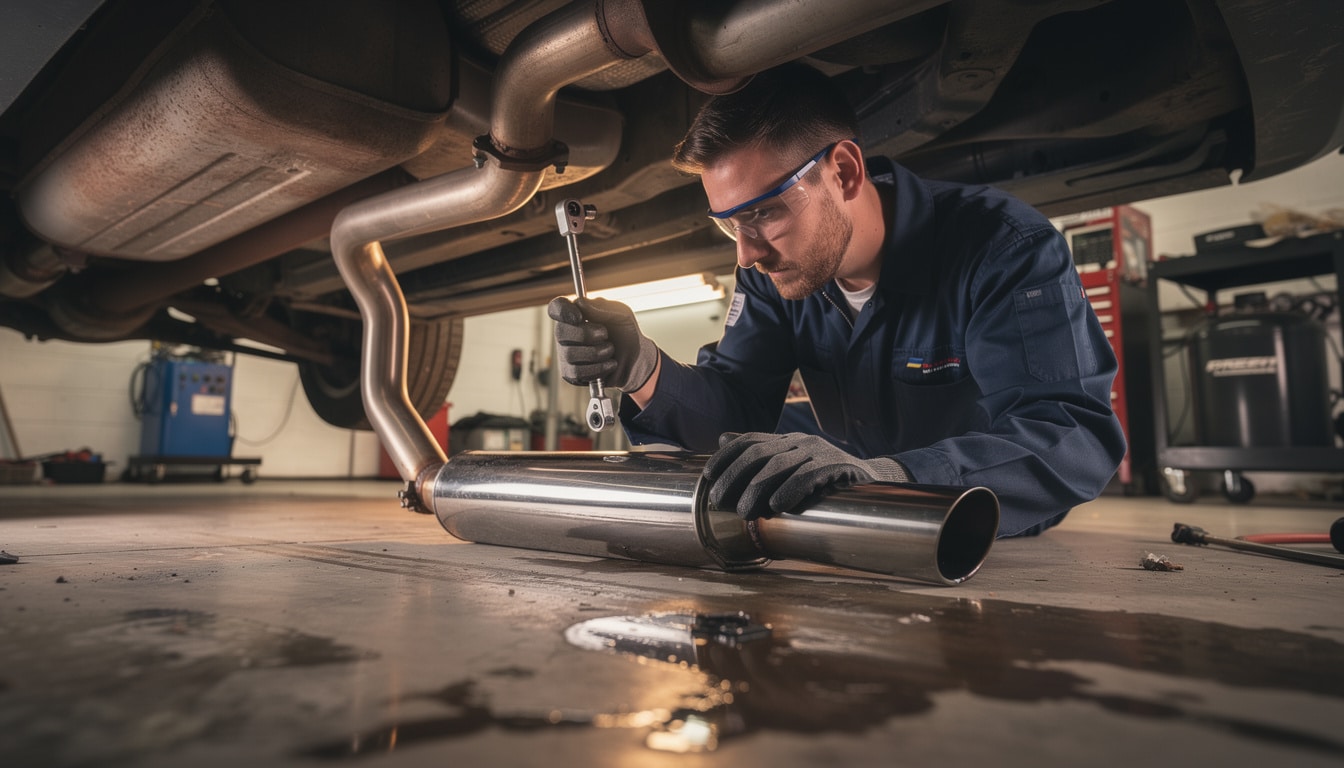
Safety gear is also vital: gloves protect against sharp edges; safety glasses guard your eyes from debris. Consider having a fire extinguisher nearby when working around flammable compounds like sealants or lubricants.
By following these safety steps vigilantly, you minimize risk and allow for quicker, more comfortable handling of the exhaust components during upgrade.
💡 Expert Tip: Always apply penetrating oil on fixing nuts hours before starting to help free seized bolts and reduce risk of damaging threads during removal.

Step-by-Step Guide to Removing and Installing a New Exhaust Back Box
The heart of any exhaust back box upgrade lies in the precise removal of the old unit and secure fitting of the new one. Approach the task methodically to avoid damaging other parts like catalytic converters or exhaust hangers.
Step 1: Locate the Exhaust Back Box
Get underneath the vehicle with a backboard to slide on. The exhaust back box lies between the catalytic converter and the rear axle, often identifiable by its larger, cylindrical silencer shape. Clean the surrounding area and spray lubricant on all accessible fixing bolts.
Step 2: Removing Old Back Box
Using a spanner or socket wrench, start loosening the fixing bolts. Rust might slow you down, so patience and repeated lubrication are key here. When bolts are off, carefully cut the exhaust pipes just before and after the back box to remove the unit fully. Free the hanger brackets supporting the part.
Step 3: Prepare Pipes for New Back Box Installation
Smooth the cut pipe edges with a file and slightly spread the ends to slip easily onto the new back box inlets. Slide clamps onto each pipe, then apply exhaust sealant liberally to ensure airtight connections.
Step 4: Attach and Secure the New Back Box
Insert the new back box into place on both ends, securing pipes with the clamps by tightening them firmly. Reattach the hanger brackets to isolate vibrations and hold the silencer in position. Finally, bolt the back box securely to the chassis using original fixings or replacements if necessary.
After completing the upgrade, lower the car and conduct a short test drive. If you notice excessive noise or leaks, recheck all seals and clamp tightness.
Common Issues During Installation:
- Stuck bolts due to rust or corrosion.
- Improperly aligned pipes leading to exhaust leaks.
- Loose hangers causing vibrations.
- Incorrect sealant application reducing effectiveness.
Maintenance Tips and Performance Benefits After Upgrading Your Exhaust Back Box
Once your new exhaust back box is securely installed, regular maintenance will keep your system performing at its best. Periodic inspections for rust, loose clamps, and hangers extend system life and maintain sound quality.
Performance exhaust upgrades such as the back box replacement can noticeably improve engine breathing, often resulting in slight power gains and better fuel economy—especially on older cars. Plus, the enhanced car sound gives your drive a sportier feel without compromising legality or comfort.
To maximize benefits:
- Periodically check exhaust clamps and fixings to ensure no movement or leaks occur.
- Use high-quality sealants and parts to avoid corrosion and premature failure.
- Avoid driving through deep waterlogged roads, which can accelerate rust formation.
This upgrade paired with well-timed fuel filter replacements and engine checks leads to a smoothly running vehicle. For detailed troubleshooting advice on fuel and engine issues, I recommend this article on fuel filter maintenance tips.
| Back Box Upgrade Benefits | Expected Outcome | Maintenance Requirement |
|---|---|---|
| Noise Reduction & Sound Quality | Deeper, controlled exhaust tone | Regular clamp and seal checks |
| Improved Exhaust Flow | Smoother engine operation, better throttle response | Clean pipes and secure mountings |
| Fuel Efficiency Gains | Lower fuel consumption in typical driving | Routine exhaust inspections |

Can I upgrade my car’s exhaust back box without professional help?
Yes, if you have basic mechanical skills and the right tools. However, ensure safety by proper lifting and use of the correct tools. If unsure, seek professional assistance.
How often should I inspect my car’s exhaust back box?
Regular inspections every 12-18 months or when you notice increased noise or vibrations help detect issues early before major repair costs arise.
Will upgrading the back box improve my car’s fuel efficiency?
Yes, a well-designed back box reduces backpressure, improving engine efficiency and sometimes leading to better fuel consumption, especially in older vehicles.
What tools do I need for a back box replacement?
Basic hand tools like spanners or socket sets, lubricants, a car jack with stands, saws for pipe cutting, and exhaust sealant and clamps are essential.
What risks come from ignoring a faulty exhaust back box?
Ignoring it can cause noise violations, reduced vehicle performance, increased fuel consumption, and potential safety hazards from exhaust leaks under the car.