Replacing a steering rack is a high-impact procedure that directly influences your vehicle’s steering control, safety, and overall driving experience. Over time, the steering rack experiences natural wear and fatigue, causing the steering to become less responsive, resulting in a demanding driving experience. This guide will lead you through a comprehensive, step-by-step installation guide designed for those serious about mastering their car maintenance and auto repair skills. Whether you’re an amateur mechanic keen on understanding vehicle steering or a professional aiming to refresh your method, you will find actionable insights and detailed instructions here.
Key Takeaways :
- The steering rack’s condition directly affects vehicle steering sensitivity and safety.
- Proper mechanic tools and preparation are essential for a successful steering rack replacement.
- Fluid drainage, careful disassembly, and flushing of the system prevent contamination issues.
- Maintaining correct rack centering during installation ensures proper wheel alignment.
- Completing the process involves bleeding the system of air and rigorous post-installation checks.
Understanding the Importance of Steering Rack and Preparation for Installation
The steering rack is a fundamental part of the car’s steering mechanism, converting your steering wheel’s rotation into lateral movement of the wheels. Without a well-functioning rack, vehicle steering becomes imprecise, heavy, or downright unsafe. This deterioration usually becomes evident over several years due to mechanical fatigue and component wear. If you have noticed that your car’s steering feels unusually heavy or sluggish, it’s often a precursor to rack failure.
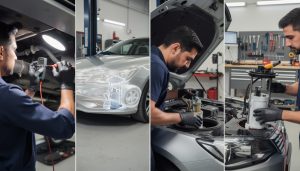
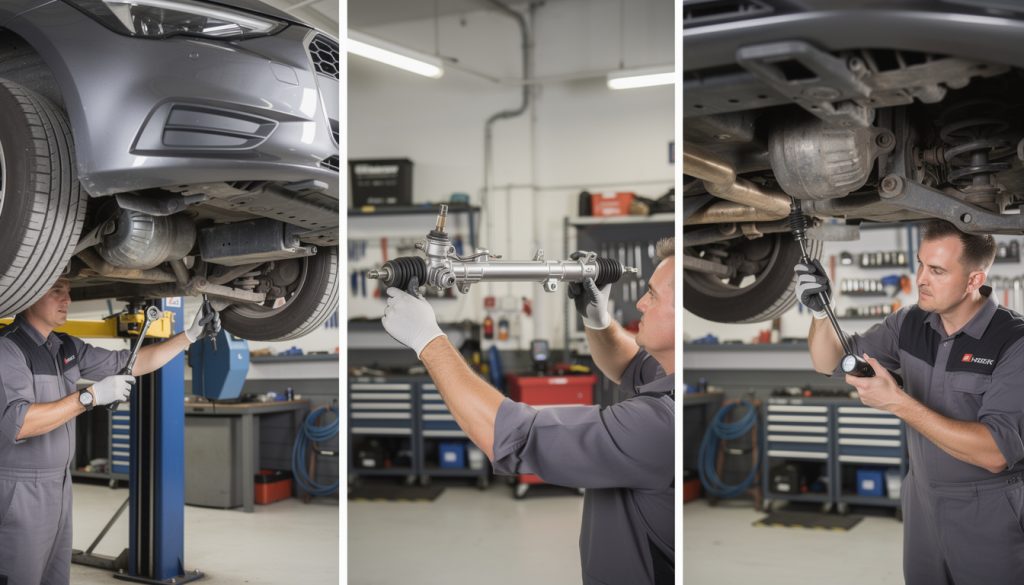
Successful steering rack installation begins well before you touch a wrench. Preparing your workspace and gathering the right tools are crucial. You will need essential mechanic tools such as a car jack, wheel nut spanner, socket and wrench sets, plus a bucket to catch draining fluids. The workspace needs to be stable, preferably a flat surface with ample lighting. This task is notably challenging because of the steering rack’s location, typically wedged tightly within the suspension system and chassis framework. Attempting the job without the proper tools or experience can lead to damage or safety hazards.
💡 Expert Tip: Before starting the installation, ensure you review your vehicle’s service manual. Specs such as torque settings and bolt sequences vary by make and model, and following official instructions can save you from costly mistakes.
Notably, certain vehicles such as the BMW Z4 and Mazda MX-5 may have unique steering rack concerns. For details about such quirks and potential impacts on rack lifespan, checking detailed reliability insights can help guide your repair plans BMW Z4 reliability issues and Mazda MX5 common problems.

Step 1: Draining Steering Fluid and Initial Disassembly
One of the first steps in this installation guide is to locate and drain the power steering fluid. Retaining old fluid can introduce contaminants into your new parts, accelerating wear prematurely. Using a fluid evacuator, slowly remove all fluid from the reservoir to ensure the system is fully cleared.
Next, you will remove the front wheels to gain access. It’s best practice to loosen the wheel nuts while the vehicle is still on the ground for added safety and torque leverage. After jacking up the car and securing it on jack stands, remove the wheels completely. Strongly insist on using reliable jack stands because the stability and safety of the vehicle during this intricate repair are paramount.
With the wheels off, you gain access to the tie rods—critical connectors between the steering rack and wheels. Detaching these requires loosening the nuts at the outer ends and carefully employing a tie rod puller tool to avoid damage. Then proceed to unbolt the clamp that secures the steering column to the pinion shaft, allowing you to disconnect the steering shaft safely.
💡 Expert Tip: Marking the tie rods with paint or tape before removal helps maintain correct alignment during reassembly, minimizing the inevitable steering alignment adjustments afterward.
Step 2: Flushing the Power Steering System and Removing the Old Rack
Before installing the new rack, flushing any residual contamination from the fluid lines and pump is vital. Connect the return line to an external container to capture old fluids and dirt effectively. Then disconnect the pressure line, directing it into a bucket. This process efficiently flushes out grit and sludge that might otherwise impair the new rack’s performance.
Removing the old rack is often the most physically demanding part of this job. It involves unbolting the rack from the chassis mounts and sometimes carefully shifting adjacent components to free the part. This can be a tight squeeze, necessitating patience and precise maneuvering.
Taking care not to spill hydraulic fluid is necessary—not just for cleanliness but also to avoid slipping hazards and environmental contamination. By this point, the rack is entirely detached from mechanical and hydraulic connections and ready for replacement.

Step 3: Installing and Aligning the New Steering Rack
Installing the replacement rack requires aligning it perfectly into the allocated space within the chassis. A common error is improper centering of the steering rack, which can result in uneven steering lock positions or uneven tire wear.
To avoid this, use a tape measure to compare the length and positioning of the new rack against the old one. Pay close attention to the placement of tie rod ends and cotter pins, ensuring all components mirror the original setup. Loose bolts or misplaced parts will compromise steering precision.
Reattach all hoses except for the return line to the reservoir to allow easier access for subsequent bleeding steps. Once seated, loosely reinstall the wheels and nuts, so adjustments remain possible as you finish assembly.

Step 4: Bleeding the Steering System and Final Checks
With everything in place and before final wheel nut tightening, it’s crucial to bleed the steering system of trapped air. Start the engine and circulate new fluid through the system by turning the steering wheel from lock to lock about 10-15 times. This process moves fluid through the rack and lines, eliminating air bubbles that cause spongy steering feel or irregular response.
After bleeding, stop the engine and reconnect the reservoir return line. Lower the vehicle safely off the jack stands and torque the wheel nuts to the manufacturer’s specifications, ensuring correct suspension load distribution and tire mounting. Conduct a careful test drive to detect any anomalies in steering feel or noise.
Adjustments might be necessary during post-installation wheel alignment, critical to achieving true directional stability and tire longevity. Steering rack replacement inherently alters suspension geometry slightly, so professional alignment ensures your vehicle handles correctly and safely on all road types.
Common Mistakes and Pro Tips for Successful Steering Rack Replacement
There are several pitfalls many encounter during steering rack replacement:
- Skipping fluid flushing: This can introduce damaging debris to the new steering components.
- Incorrect rack centering: Leads to uneven steering and premature tire wear.
- Not marking tie rod positions: Which causes alignment difficulties and requires extensive adjustments later.
- Loose or improperly torqued bolts: Can result in dangerous play in the steering system.
- Failure to bleed air post-installation: Leads to poor steering response and unpredictable handling.
Following this installation guide closely, paired with quality replacement parts and correct mechanic tools, will guarantee a successful, safe repair. Keep in mind that working methodically and cautiously can often mean the difference between a one-time fix and recurrent problems.
| Step | Action | Important Notes |
|---|---|---|
| 1 | Drain steering fluid and remove wheels | Use fluid evacuator, safely jack up car, loosen nuts on ground first |
| 2 | Detach tie rods and steering column | Mark tie rods, use correct tools, careful with hydraulic lines |
| 3 | Flush power steering system | Disconnect return and pressure lines, collect debris |
| 4 | Remove old steering rack | May require shifting other components |
| 5 | Install and align new rack | Center rack properly, loosely reinstall wheels |
| 6 | Bleed system and finalize installation | Turn wheel lock to lock, torque wheel nuts, get alignment done |
Steering rack replacement can fundamentally improve your driving comfort and safety. Taking a meticulous, knowledgeable approach will serve you well long past this repair, proving invaluable to anyone interested in mastering hands-on car maintenance and auto repair.
How do I know if my steering rack needs replacement?
Signs include stiff steering, unusual noises, leaking power steering fluid, or play in the steering wheel. Uneven tire wear can also indicate rack issues.
Can I replace a steering rack myself?
The job demands advanced mechanical skills and proper tools. Novices should consider professional help to ensure safety and proper installation.
How much does steering rack replacement cost?
Costs vary by vehicle and location, typically ranging from $500 to $1500 including parts and labor. Using quality replacement parts can influence pricing.
What tools are essential for steering rack installation?
You need a car jack, jack stands, wheel nut spanner, socket and wrench sets, tie rod pullers, and fluid evacuators among other standard mechanic tools.
Is wheel alignment necessary after replacing the steering rack?
Yes, alignment is crucial as the steering geometry shifts after rack replacement, affecting tire wear and handling safety.